Organizing Home & School- Crafts

Organizing Your Home and School- Craft Supplies
Check out
Day 1- RECIPE BINDER
Day 2- HOMESCHOOL SUPPLIES & BOOKS
Check out
Day 1- RECIPE BINDER
Day 2- HOMESCHOOL SUPPLIES & BOOKS
Nothing like having your crafts organized and easy to get to. Over the past year I've been working on keeping all my cardmaking crafts organized and a home for everything I have. This has been an undertaking but WOW, I love it. It was well worth the time it took to get it all organized. Now I know where everything is, it's easy to get to and when I want to make a card, I just go and start. No need to worry about where things are..
I started out by organizing my paper. I had a HUGE selection of paper from solids to patterns and most were tucked away and still in there original bindings. I went through each sheet and tore them apart and organized them by gender and whether they were patterned or solid. I now have a large crate with my 12 x 12 paper organized with dividers. I have a 6 x 6 mini crate organized the same way and my solid colored 8 1/2 by 11 paper is organized by color.


This above is more organized 12 x 12 paper. Each sheet is now easy to just pick up and use instead of having the thumb through pages that were still adhered to their folders.

My solid 8 1/2 by 11 paper organized by color

6 x 6 paper organized with dividers by gender and whether it's patterned or solid.
I also did this with my 8 x 8 paper. I just forgot to take a picture of it done.
On another day I spent the whole day organizing my ribbon. I started about a year ago storing them in glass cookie jars but over time I bought a lot of ribbon and got behind in putting them in there. I would unwrap them from their original containers and roll them each onto a wooden clothespin and store them color coded in the cookie jars. Well after I finally got them all done, I realized I had more than what the cookie jar could hold, so I went out and bought these really nice jars with lids since they are stored on top, dust won't get in the jar.

Then came the big change. I organized all my crafting drawers. Purchased a lot of drawer organizers at the Dollar Tree and went to work. Took me an entire day and a half to re-arrange everything and use the organizers to help me put everything in a good place to make it easy for me to make cards quickly.
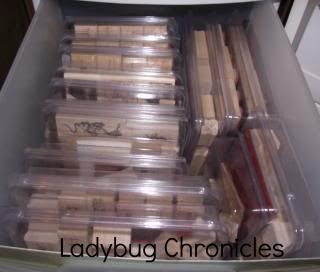
Here is one of my drawers that holds my wood stamps. I have three total
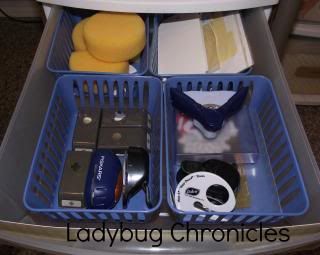
This has my small punches, and sponges for ink stamping
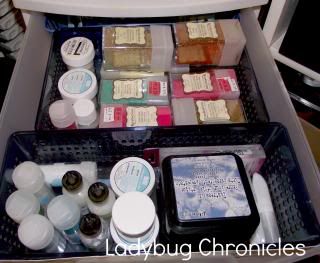
All my glitter love is in this drawer along with my Tim Holtz ink
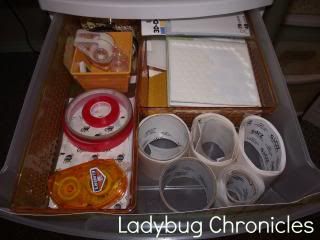
Any kind of adhesive is in this drawer
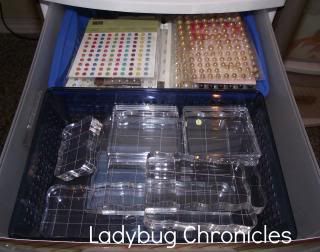
My clear stamp blocks up front and the back holds my pearl, rhinestones for card bling!
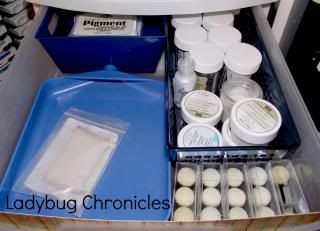
Everything that has to do with embossing is in this drawer along with my extra sponge daubers
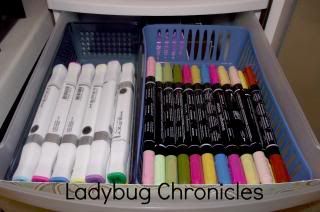
I have my Copic markers and Stampin Up ink markers in this drawer


Before


Before

After

Before-Another view

After- Another view


Here is a couple shots of the fabric lining when I pulled the drawers out from the wall. Doesn't it make the plastic containers look so much nicer. I absolutely love how they keep everything in my drawers private and makes the containers look more upscale verses plastic drawers.
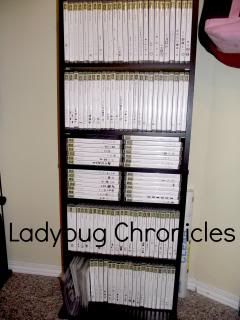
After all my drawers were completed I worked on organizing all my clear stamps. Purchased this shelving unit at the store and it now holds all my Stampin Up Clear Stamp sets.

My larger decorative punches hang on white curtain rods over my craft table so it's easy access when I'm making cards. Just recently I added the top by with a total of 4 since I purchased more punches..
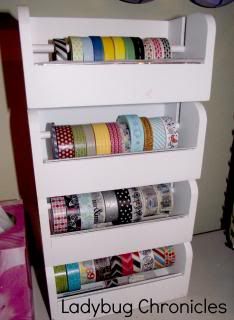
On my craft table I added these really cool washi tape dispensers that I picked up at Michaels. Since I love washi tape I needed four dispensers which gives me room to add a few more..
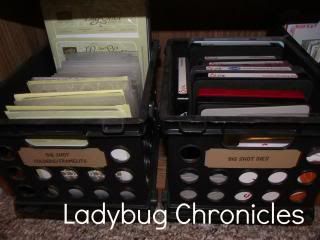
These mini crates hold anything that has to do with my Big Shot machine. The left side is embossing folders and the right is all the die cuts.
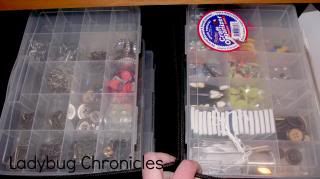
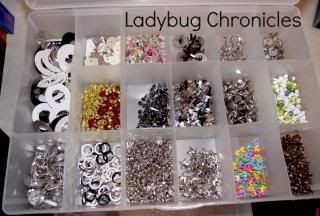
Above my Big Shot crates I have two fabric crates that house my embellishments as you can see above. Each bin holds 4 of these plastic containers and I have all my embellishments organized as you can see below..
I love my organized craft room. It really allows me to make my cards quickly without having to figure out where such and such is.. Do you have a special way you organize your crafting supplies. Would love to hear from you!

Here is one of my drawers that holds my wood stamps. I have three total

This has my small punches, and sponges for ink stamping

All my glitter love is in this drawer along with my Tim Holtz ink

Any kind of adhesive is in this drawer

My clear stamp blocks up front and the back holds my pearl, rhinestones for card bling!

Everything that has to do with embossing is in this drawer along with my extra sponge daubers

I have my Copic markers and Stampin Up ink markers in this drawer
After all the organizing I still didn't like how the clear drawers looked from the outside. I could still see inside the drawers because they were see through and even though they were organized it didn't look like it through the drawer faces and from the side. So I lined each drawer face with beautiful decorative scrapbooking paper and then sewed a fabric side/top cover for the sides of the drawers. The finished product looks awesome and it really makes my craft room look more elegant instead of a plastic storage bin area..
Before
After: with the paper and the fabric lining on the side
Before
After. You can't see the fabric lining really well on these two sets as they are tucked away next to my bookcase. These are two drawer sets stacked on top of each other. I lined each set separately in case I ever decide to move them.
Before
After
Before-Another view
After- Another view
Here is a couple shots of the fabric lining when I pulled the drawers out from the wall. Doesn't it make the plastic containers look so much nicer. I absolutely love how they keep everything in my drawers private and makes the containers look more upscale verses plastic drawers.

After all my drawers were completed I worked on organizing all my clear stamps. Purchased this shelving unit at the store and it now holds all my Stampin Up Clear Stamp sets.

My larger decorative punches hang on white curtain rods over my craft table so it's easy access when I'm making cards. Just recently I added the top by with a total of 4 since I purchased more punches..

On my craft table I added these really cool washi tape dispensers that I picked up at Michaels. Since I love washi tape I needed four dispensers which gives me room to add a few more..

These mini crates hold anything that has to do with my Big Shot machine. The left side is embossing folders and the right is all the die cuts.

Above my Big Shot crates I have two fabric crates that house my embellishments as you can see above. Each bin holds 4 of these plastic containers and I have all my embellishments organized as you can see below..

I love my organized craft room. It really allows me to make my cards quickly without having to figure out where such and such is.. Do you have a special way you organize your crafting supplies. Would love to hear from you!
Thanks for stopping by today so I could share how I organized my crafting room and supplies. Stop by tomorrow to see how I organize digital photos.. Until then....
Don't forget to check out the other wonderful ladies that have participated in this week's Blog Hop to see what they've shared... I'm including 8 of the 60+ that are participating below.
Don't forget to check out the other wonderful ladies that have participated in this week's Blog Hop to see what they've shared... I'm including 8 of the 60+ that are participating below.
Dawn @ Guiding Light Homeschool ~ Homeschooling with Excessive Energy
Lexi @ Lextin Academy ~ The Homeschool Dad, CEO
Cristi @ Through the Calm and Through the Storm ~ Homeschooling Thankfulness
Melissa @ Mom's Plans ~ Historical Field Trips
Karen @ Tots and Me ~ Making Geography Fun
Adena @ AdenaF ~ Mnemonics
Amy @ Homeschool Encouragement ~ Lego Learning
Erin @ For Him and My Family ~ Record Keeping


Comments
Post a Comment
Thanks for taking the time to leave a commment. I love hearing from you. Many blessings to you!